I had this posted in The "off topic" section of the forums but due to out most recent forums update i am now reposting it here...

1 – Creating a New Image, and Setting Adobe Photoshop's Undo Option
Click File > New, and create a new image of any size you desire.
Press Ctrl+K to bring up the Preferences window.
Change your "Redo Key" to Ctrl+Shift+Z. This enables you to press Ctrl+Z at any time, to undo the last thing(s) you did. Remember this.

2 – Using Adobe Photoshop's Layers window
The Layers window shows the various layers that your image is made up of.
To make a new layer, click the New Layer button, as shown by the red arrow.
To work on a different layer, click on that layer. The eyeball will apear next to that layer.
You can drag layers up and down the list.
Remember – create a new layer for each part of your image. This allows you to go back and edit the layers individually. Every Adobe Photoshop beginner at some time makes a masterpiece, only to find out that they did it all on one layer, and now they can't remove those pink clouds they put on it.

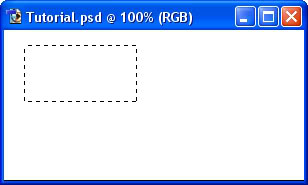
3 – Learning about Selection
One of the most important concepts in Adobe Photoshop is Selection.
This is the Rectangular Selection Tool.
Use this tool on your image to select an area of the image. This lets Photoshop know that that's the area you want to work on.

4 – Adding to a Selection and making a square
To add to a selection, hold Shift before dragging.
Tomake the selection exactly square, start dragging, then hold Shift.
You can press Ctrl+D to "deselect" and remove the selection at any time.

5 – Elliptical Selections and subtracting Selections
Hold down on the Selection Tool on the Toolbar, and choose the Ellipse.
To move the selection, just click inside it and drag.
Holding Alt while selecting subtracts that area from the selection. I've done that with the Ellipse Selection Tool.

6 – Choosing a colour
Now that you know how to select an area in Adobe Photoshop, we can look at some tools that can do something with that area.
Before we get started on colouring your selection, you'll need to pick a colour.
This part of the Toolbox is where you select your colours.
The top square is the foreground colour. If you use a brush or paint bucket, it will apply this colour.
The bottom square is the background colour. It has various purposes, but it's also a good place to store a second colour that you're using.
Click on either square to change its colour.
Click the arrow to swap the two colours.
Click the little squares to reset the colours to black and white.

7 – The Paint Bucket and Gradient tools
These two tools share a button on the toolbar. To select one, click and hold.
On a new layer, just click the Paint Bucket tool inside the area of your selection to fill it with the colour you've selected.
Click and drag from one area to another to fill the area. The point where you started to click will be the colour of your foreground colour, and the point where you took your finger off the mouse button will be the colour of your background colour. The area in between will gradually change from one colour to the other.
In this case, I went from corner to corner, with the default white and black selected.

8 – A colour exercise
With what you've learned so far, you should be able to recreate this piece of hippy history.
Remember to create each step on a new layer.
9 – Adding Effects
Now that you know the basics, it's time to start adding some easy special effects.
To demonstrate Adobe Photoshop's special effects, here's an unembellished button for a website.
Each part of this image is on a separate layer.
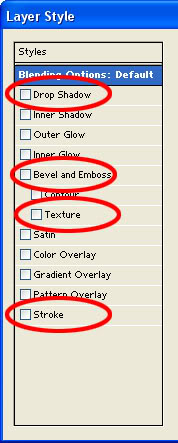
10 – Key Adobe Photoshop Blending Options
In the Layers list, right-click on a layer, and select Blending Options.
This is a picture of the left-hand portion of the Blending Options window that will appear. (This image is from an older version of Photoshop, but it looks very similar in newer versions.)
Drop Shadow - Selecting this option will make your layer cast a shadow on layers below it.
Bevel and Emboss - Makes the layer like a block of gold bullion - raised in the centre, with edges that slope down. (This is a good effect for creating buttons.)
Texture - Makes the surface of the layer look like it's made of wood, stone etc. Use the "Overlay" setting.
Stroke - Stroke is just another word for "outline". A Stroke is useful to make an object stand out from its background.
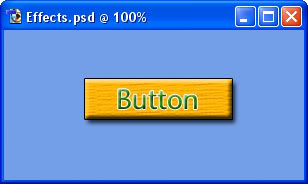
11 – The end result
Other than using some of the Blending Options, nothing else has been done to this button.
It's really that easy
A final few Adobe Photoshop features
Zoom: Press (Ctrl and +) to zoom in. Press (Ctrl and -) to zoom out. This is very useful if you're a bit of a pixel pirate
Transformation: To Transform (resize/rotate/distort) an object, press Ctrl+T. To Transform a selection, click Select > Transform Selection. Use the Shift key while transforming to stop the image distorting.